Epiphan Systems first to announce compatibility with Windows 7
July 31, 2009 by Victor · Leave a Comment
As the Windows 7 Release Candidate was made for free public downloading this week, manufacturers of hardware and software developers were able to test their software and hardware compatibility with Microsoft’s new operating system, slated to hit retail stores in October 2009.
Epiphan Systems, the manufacturer of external frame grabbers, recording, and broadcasting solutions for VGA and DVI has announced that all of its’ devices run smoothly under a Windows 7 environment and that the latest version of their software includes full support for this new operating system.
However, users may encounter some difficulties upon upgrading to this new OS, so it is still recommended that you reinstall the software when upgrading from XP or Windows Vista, as the drivers might not remain after the update.

ScreenCaptureNews will keep you updated as more software and hardware developers announce their products’ compatibility with Windows 7.
PrintScreen.Me: Extend your PrintScreen Functionality
July 24, 2009 by Victor · Leave a Comment
Are you a frequent user of the PrintScreen key? Ever wanted to get more out of that button? Sure, you can paste from the PrintScreen clipboard to any image editing or annotation program of your choice, but now there is a free alternative that extends the PrintScreen button’s functionality and makes it easy to create annotated screenshots and upload them right away to an image sharing site of your work. PrintScreen.Me works in four easy steps:
- Capture your screen with the PrintScreen button
- Annotate, draw, and add notes to your screen capture
- Upload screenshot directly to Facebook, Twitter, Picasaweb, Flickr, or PrintScreen.Me’s free image server.
- E-mail, print, or archive the screen capture.
Using PrintScreen.ME
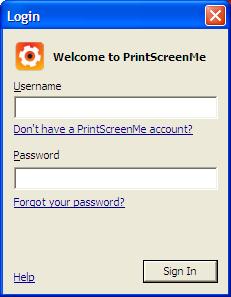
You must first download and install the PrintScreen.ME program, it is available as a free download and works with Windows machines only. Once you install the program and run it, it will prompt you for a user name and password:
You must set up an account over at PrintScreen.ME. Luckily, the only personal information that is asked for is an e-mail. If you don’t want to disclose your e-mail address, however, anything may be entered into the box, as PrintScreen.ME does not require e-mail verification. After creating your account, you will be prompted to enter your account names and passwords for photo sharing sites like Facebook, Flickr, Twitter, etc.
The entire setup process takes less than 2 minutes. Once the program is installed, an icon should appear in the lower right (this screenshot was created with PrintScreen.ME):
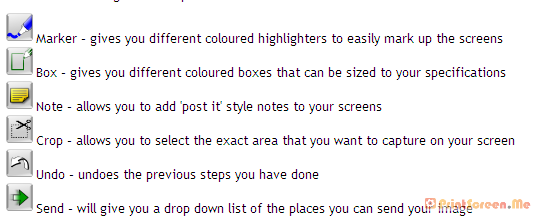
Now, upon pressing the PrintScreen button you will be able to use PrintScreen.ME to edit and upload your screenshots. Here is a more detailed breakdown of PrintScreen.ME’s annotation features:
The verdict?
PrintScreen.ME is an extremely easy tool to use and comes in very useful. However, it has one huge drawback which is my reason for removing this program after using it for a day – no dual-screen support. This means that there is no way to capture the image on your second screen. It’s very upsetting that a fairly good program would not support such features, when the standard PrintScreen functionality in Windows camptures multiple monitors without a problem.
Capturing Video from Nintendo DS
July 7, 2009 by Victor · 8 Comments
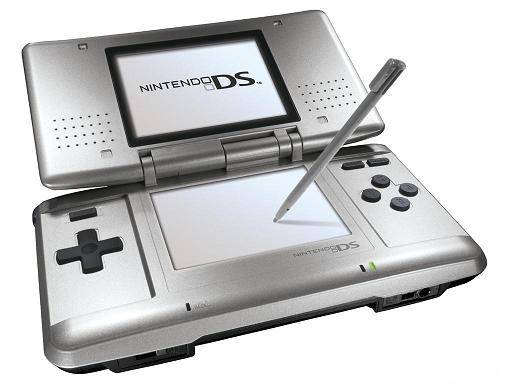
While some portable game systems like the Sony PSP have built-in screen capture, the DS from Nintendo is disadvataged in this respect. There is no simple way of capturing the screen by recording to a file, and the DS does not have a TV-out. This article will review and discuss several ways of recording videos from a Nintendo DS or DS Lite, as well as replicating the DS’ screen on a TV.
TV-out devices
The first way to output your DS’ screen to a monitor or TV is by using a third party TV-out device made specifically for the Nintendo DS. Initially, there were two different models available, but only one is being produced now.
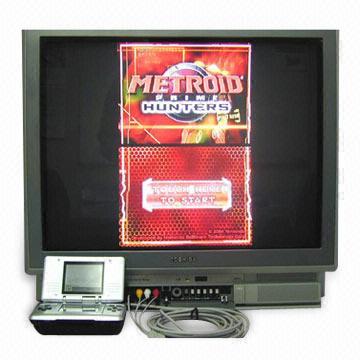
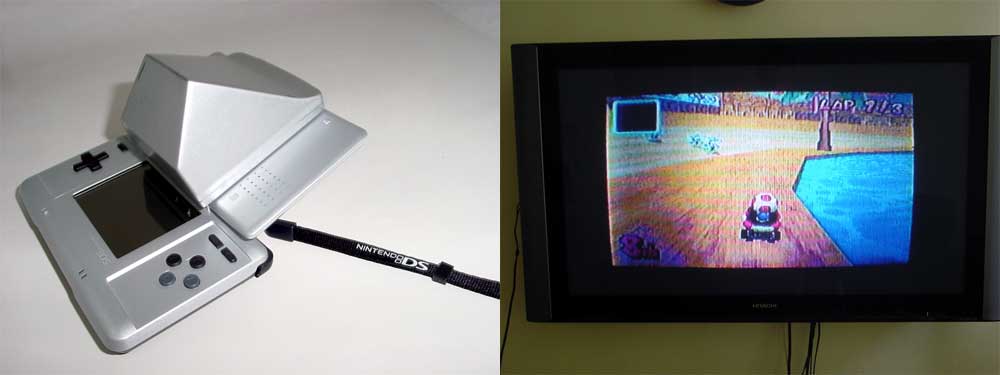
The now discontinued DS to TV adapter was made in Taiwan by Q-Mark. This is the best TV-out device available for the DS, letting you see the output of both LCD screens on a TV. The downside to the Q-Mark device is that the DS has to be modified in order to accomodate the TV adapter, making it bulky and less portable. The Q-Mark device is shown below.
Another screen capture device for the Nintendo DS is the camera-based “Video Game Controller Adapter,” also made by Q-Mark. It can be purchased here and consits of a small device the slips over the upper screen of the DS, pictured below.
The latter device consists basically of a camera that is pointed at your screen, and, because of the way it is attached to the DS, only one screen is visible. Of course, quality is compromised as the camera optics are not of extremely high quality and lighting conditions severely impact this device’s operation.
Either way, if it becomes hard to find the DS to TV adapter and only the camera-based Q-Mark unit is available, it is still tolerable, as long as you intend on playing on one screen only.
Recording and broadcasting video from the Nintendo DS if using TV-out devices
If one of the devices mentioned above is used with the Nintendo DS, and the goal is to capture the video in order to record it, share it on a site like YouTube, or broadcast it, any capture card or video card with Video-in (RCA) will do the trick. YouTube even supports on-the-fly recording, so as long your capture card or video card is set as the webcam device in Windows, and your DS is connected to your capture card via one of the DS-to-TV adapters mentioned above, you’re ready for recording!
For live broadcasts, a variety of software can be used, but we recommend the free Windows Media Encoder. Details on how to use Windows Media Encoder in order to broadcast a video stream from an external device can be found here.
Using an Emulator to Record Gameplay
Using a software emulator on a computer is the cheapest and best way to record gameplay of the Nintendo DS, but is only really suited for short operations and not intended for lengthy game play. An emulator is a software program which replicates the functions of the Nintendo DS. In order to load games to it, you will need to find “ROMs” of each game. Downloading ROMs may be illegal depending on the laws of the country where you live.
Follow this link for a list of free emulators for the Nintendo DS. Once the emulator of your choice is up and running, you must simply capture your screen using either software for screen capture (we have reviewed lots of different programs in our Software as well as News sections) or by connecting a frame grabber to your computer monitor.
An Awesome New Tool for Web Based Webpage Screenshots and Annotations
July 6, 2009 by Victor · 2 Comments
Here at ScreenCaptureNews, when it comes to software, we like everything that’s free, useful, and simple. A good example of an application that abides by those three rules would be Aviary. Think of Aviary as a tool for capturing screenshots of webpages, similar to FireShot, which we earlier reviewed.
How it works
The way it works is quite simple, just place www.aviary.com/ before the URL of the webpage that you would like to capture.
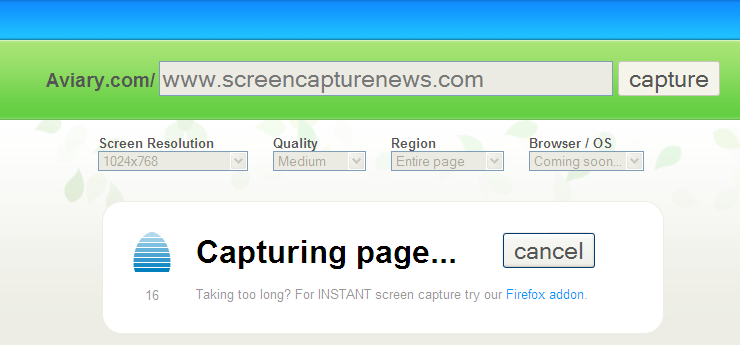
Once that is done, you will be taken to a loading page, it means that your capture was successful and the Aviary image editor is starting.
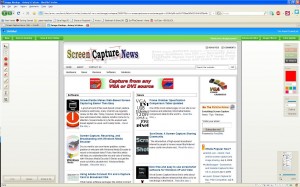
You will then be taken to a full-blown image editor, as pictured below. The features are pretty self explanatory. Once you are done editing, you may click on “save to desktop” or “save & host online,” depending on what you would like to do with your saved capture.
Advanced Screenshot Editor
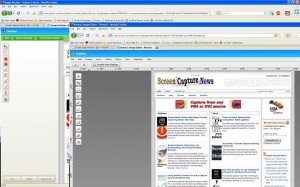
The most amazing feature of Aviary is, by far, the advanced editor, pictured below. It can be accessed by clicking on “Advanced Editor” in the top right of the window.
Those that work with Photoshop will have an easy time adapting to the advanced image editor, which tries to replicate the Photoshop interface and functions with some features like layers, history, magic wand, smudge tool, liquify tool, freeform selection tool, and more. All these features definitely make this web based applet more advanced than most free screenshot editors which need to be installed. What’s more, Aviary works with all operating systems including Windows, Mac OS and Linux, and allows for direct uploading of an image to the Aviary web servers, where you can share it with others.
Conclusion
If you don’t have a webpage screenshot editing tool that you’re used to, or if you’re looking to try something new, I would definitely recommend Aviary. It’s easy to use, it’s free, and it’s packed with features that you won’t find anywhere else!
Frame Grabber Specification Comparison Table Updated
July 3, 2009 by Victor · Leave a Comment
One of the most visited pages on our site is our massive and extremely informative feature comparison table for the world’s best VGA and DVI frame grabbers. Since it was created, some manufacturers have changed the specifications for their devices, while Epiphan Systems introduced the VGA2Ethernet frame grabber, which is now part of the table.
The first thing that you may notice is that the VGA2Ethernet has much higher specifications than any other frame grabber on the market. This is due to the fact that the VGA2Ethernet is a much more sophisticated device and, as such, is not really comparable to the other grabbers.
Why is the VGA2Ethernet different?
You can think of the VGA2Ethernet as a separate small computer equipped with a frame grabber. As such, it is able to function remotely. In other words, the VGA2Ethernet does not have to have close proximity to the target computer, as is the case with PCI or USB based frame grabbers. As shown below, the only requirement for the VGA2Ethernet is that it be on the same network as the target computer, and within proximity of the source that it is capturing the VGA signal from.
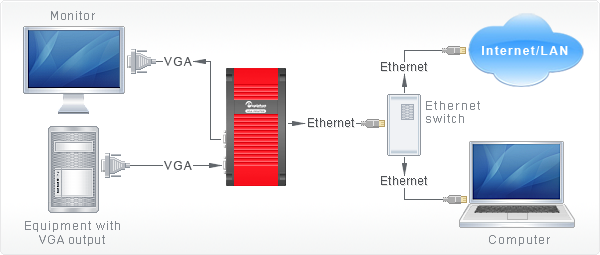
The fact that the VGA2Ethernet can be separated from the target computer distance-wise is not the only thing that makes this device different from others, however. By using the Gigabit Ethernet bus to transfer the images and a PowerPC processor paired with an advanced FPGA, the VGA2Ethernet is able to digitize images at resolutions up to 2048 x 2048 and, depending on the change in content from frame to frame, transfer them at up to 120 frames per second, making the VGA2Ethernet significantly faster than other any frame grabber available on the market.
Please click here to go to our complete VGA frame grabber review and specification page. Do not hesitate to contact us should you wish another product to be added to the table.


