Capture and Record Video from Apple iPad
May 25, 2010 by Victor · 8 Comments
The new iPad by Apple, a supersized version of the iPod/iPhone, is a tablet computer that features a 9.7″ display with multitouch touch screen technology, running at a resolution of 1024×768.
Recording the entire screen would come in very handy for development, troubleshooting, training videos, demos, podcasts, and even direct broadcasts from the iPad screen.
While a native software solution to iPad screen capture is either weak or nonexistent, there is an ideal and low-cost hardware capture solution that will allow you to capture the entire contents of the screen without slowing down or otherwise altering the functionality of the Apple iPad.
This solution consists of two things: the Apple iPad dock connector to VGA adapter (pictured below), available from the Apple store ($29) and the Epiphan Systems VGA2USB ($299).
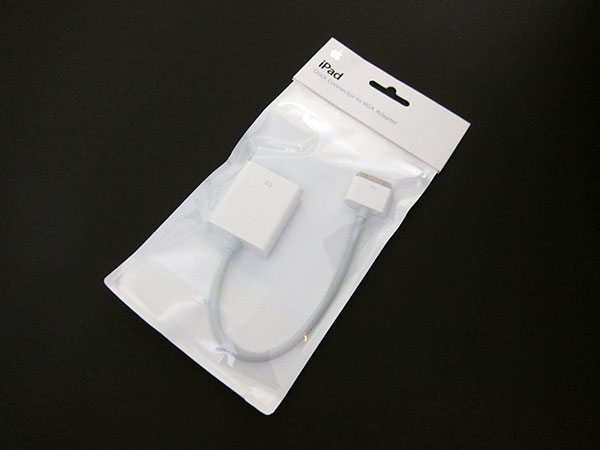
The iPad to VGA dock connector currently allows you to add a VGA port to the Apple iPad and mirror the image on the iPad’s screen on the output. In the future, Apple will add support for applications to use this external output.
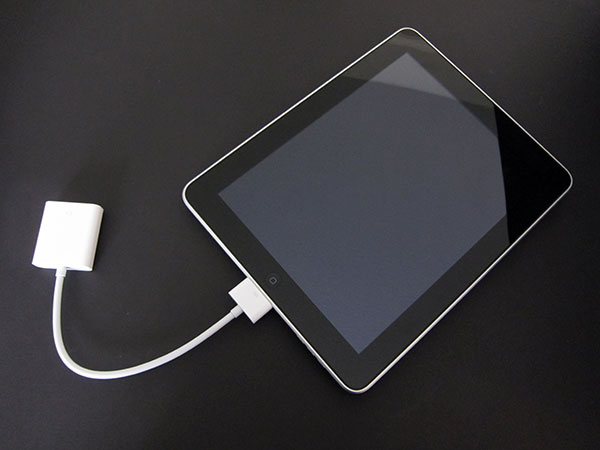
In order to record video from Apple’s iPad, we must begin by connecting the iPad to VGA adapter to the iPad, and connecting the Epiphan Systems VGA2USB to the VGA side of the adapter. A more detailed diagram is shown below:
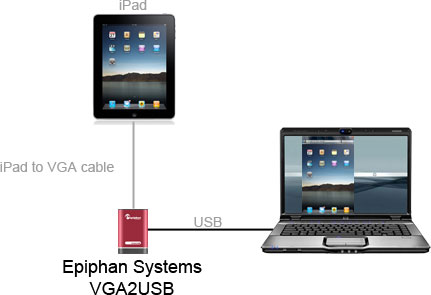
The captured video from the iPad can be recorded on the computer using free software provided by Epiphan Systems, or any other video capture software that supports external devices, such as Adobe Premiere or VirtualDub.
Furthermore, the images and video from the iPad can also be broadcast using software such as Windows Media Encoder or QuickTime Broadcaster.
More information on the VGA2USB can be obtained directly from Epiphan’s website here: http://www.epiphan.com/products/frame-grabbers/vga2usb/
Epiphan Systems Releases PCI Express VGA Frame Grabber
In an unexpected move, Epiphan Systems unveiled its’ VGA2PCIe frame grabber today – a completely internal frame grabber based on the PCI Express bus. This move is unexpected because Epiphan specialized in external USB and Ethernet based devices.

The VGA2PCIe is a fairly basic 1-channel VGA frame grabber. At the same time, VGA2PCIe offers capture rates that are impressive to say the least. Let’s take a look at the advantages and shortcomings of this new device:
Advantages:
- No compression when transferring the from VGA to the PC, meaning that your computer will see the VGA signal in 100% lossless, raw quality.
- Capture rates vary between 35-85 frames per second, making this frame grabber ideal for high frame rate applications.
- VGA2PCIe is able to capture full HD (1920×1080) video at high frame rates.
- VGA2PCIe is based on 1x PCI Express, meaning it will fit in any PCI Express slot.
- For a price of $800, this is lower than other competing internal devices.
Shortcomings:
- Only one channel for VGA capture, although several VGA2PCIe devices can be installed on the same machine.
- No drivers for Linux or Mac, but Epiphan promises to add them in the near future.
- No audio input capture support, while other frame grabbers in Epiphan’s product line (like the VGA2Ethernet) support a stereo audio input.
Conclusion
VGA2PCIe is a strong contender in the internal frame grabber market. It should definitely be put under consideration if you are shopping for an internal VGA frame grabber. The specifications are impressive an Epiphan’s support has always been great.
Epiphan Systems Announces New Open Source Frame Grabber
October 14, 2009 by Victor · Leave a Comment
A first in the market of high resolution video capture hardware, Epiphan Systems has announced a new open source frame grabber – Epiphan Lecture Recorder.
According to the product page, shipping of the Lecture Recorder will start sometime in November. Epiphan Lecture Recorder, or ELR in short, has some promising features that, at the price tag of $2000, are unbeatable by similar offerings.

ELR’s Unique Features
Even though this product seems to be aimed at the educational market, Epiphan Lecture Recorder has some unique features that make it a perfect frame grabber for pretty much any application. Firstly, ELR supports not only DVI and VGA capture, but also has on-board inputs for composite video and stereo audio.
Furthermore, Epiphan Lecture recorder has a very generous 32GB of buffer memory, which is expandable via portable flash sticks, network drives, or external hard disks.
Finally, ELR features 5 USB ports for external devices and peripherals, meaning that you can create software that will allow you to connect external control devices such as IR remotes, CD/DVD writers, wireless modules, an so on.
Open Source
As mentioned earlier, Epiphan Lecture Recorder will be an open source device. What this means for developers is that it is possible to access all features of the frame grabber. And, because the ELR is more of an embedded computer or internet appliance, many interesting applications can be written for it. For example, the ELR, as it has an Ethernet network interface, can function as its own server, as pictured below.

In a Nutshell
The Epiphan Lecture Recorder is more of a computer with on-board frame grabber and video and audio capture cards than it is an actual frame grabber. While this might not be the ideal device for the general public, the ELR could be used as a platform for a wide variety of applications.
Click here to view Epiphan Lecture Recorder’s product page on Epiphan Systems’ website.
Shutter – A Tool for Linux Screenshots
August 15, 2009 by Victor · Leave a Comment
Shutter is a fully-featured screenshot tool for Linux. Within one window, Shutter lets you take a screenshot of the screen, a window, or an area of the screen, edit it, and upload it to the web. Shutter is fully open source and, according to their website, has the following features:
Features:
- take a screenshot of your complete desktop, a rectangular area or capture a website
- take screenshot directly or with a specified delay time
- save the screenshots to a specified directory and name them in a convenient way
(using special wild-cards) - Shutter is fully integrated into the Gnome Desktop (TrayIcon etc.)
- generate thumbnails directly when you are taking a screenshot and set a size level in %
- Shutter session collection
- keep track of all screenshots during session
- copy screeners to clipboard
- print screenshots
- delete screenshots
- rename your file
- upload your files directly to Image-Hosters (e.g. http://ubuntu-pics.de), retrieve all the needed links and share them with others
- edit your screenshots directly using the embedded drawing tool
It works like your standard screen capture program (we review such programs all the time) and does not yet have a video recording feature. The program can be set to run automatically as soon as you press the PrtScn or Alt+PrtScn buttons. Read here about configuring Shutter to activate automatically.
Extended Features/Plugins
One neat thing about Shutter is the support of plugins.

These plugins are able to create effects similar to those in GIMP and PhotoShop but directly in Shutter, making it a nice tool for web developers who want to add effects to images on their website, but either don’t have the expertise or the time to do so. All plugins have a slate of settings to make your image look just the way you want it.

Uploading your Images
Shutter lets you upload your screen captures to a wide variety of free image sharing websites. One of the neatest feature of the upload feature is that you get embed and direct links to the uploaded images right away, without the need to launch a browser.

Conclusion
Shutter is a very powerful and fully-featured tool for capturing still screenshots within a graphical Linux environment. As a matter of fact, it surpasses many of its’ Windows counterparts in features, ease of use, and usability. For more information about Shutter for Linux visit http://shutter-project.org/.
Capturing Video from Nintendo DS
July 7, 2009 by Victor · 8 Comments
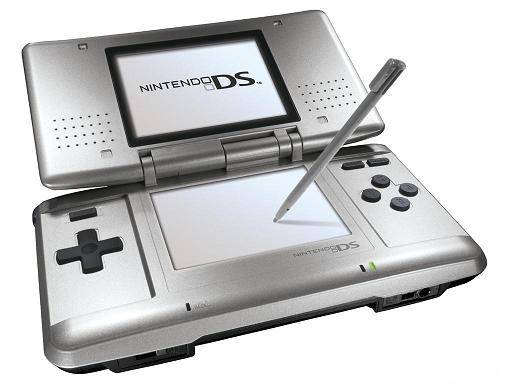
While some portable game systems like the Sony PSP have built-in screen capture, the DS from Nintendo is disadvataged in this respect. There is no simple way of capturing the screen by recording to a file, and the DS does not have a TV-out. This article will review and discuss several ways of recording videos from a Nintendo DS or DS Lite, as well as replicating the DS’ screen on a TV.
TV-out devices
The first way to output your DS’ screen to a monitor or TV is by using a third party TV-out device made specifically for the Nintendo DS. Initially, there were two different models available, but only one is being produced now.
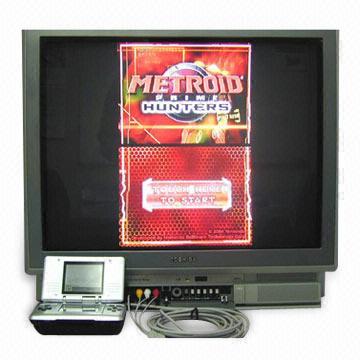
The now discontinued DS to TV adapter was made in Taiwan by Q-Mark. This is the best TV-out device available for the DS, letting you see the output of both LCD screens on a TV. The downside to the Q-Mark device is that the DS has to be modified in order to accomodate the TV adapter, making it bulky and less portable. The Q-Mark device is shown below.
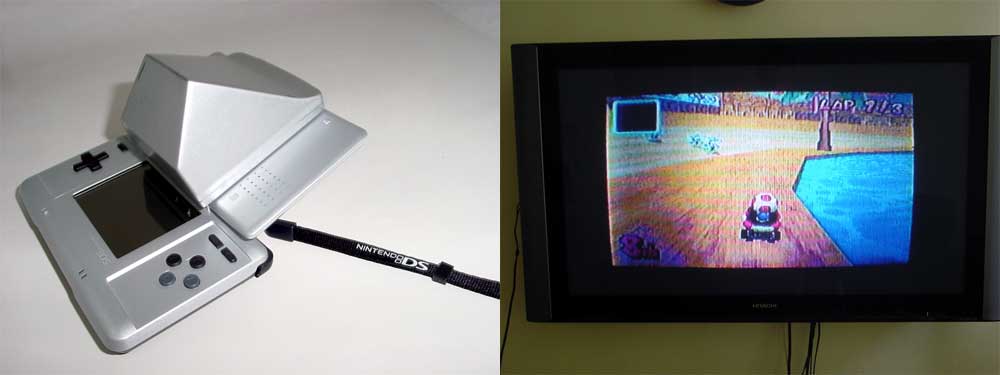
Another screen capture device for the Nintendo DS is the camera-based “Video Game Controller Adapter,” also made by Q-Mark. It can be purchased here and consits of a small device the slips over the upper screen of the DS, pictured below.
The latter device consists basically of a camera that is pointed at your screen, and, because of the way it is attached to the DS, only one screen is visible. Of course, quality is compromised as the camera optics are not of extremely high quality and lighting conditions severely impact this device’s operation.
Either way, if it becomes hard to find the DS to TV adapter and only the camera-based Q-Mark unit is available, it is still tolerable, as long as you intend on playing on one screen only.
Recording and broadcasting video from the Nintendo DS if using TV-out devices
If one of the devices mentioned above is used with the Nintendo DS, and the goal is to capture the video in order to record it, share it on a site like YouTube, or broadcast it, any capture card or video card with Video-in (RCA) will do the trick. YouTube even supports on-the-fly recording, so as long your capture card or video card is set as the webcam device in Windows, and your DS is connected to your capture card via one of the DS-to-TV adapters mentioned above, you’re ready for recording!
For live broadcasts, a variety of software can be used, but we recommend the free Windows Media Encoder. Details on how to use Windows Media Encoder in order to broadcast a video stream from an external device can be found here.
Using an Emulator to Record Gameplay
Using a software emulator on a computer is the cheapest and best way to record gameplay of the Nintendo DS, but is only really suited for short operations and not intended for lengthy game play. An emulator is a software program which replicates the functions of the Nintendo DS. In order to load games to it, you will need to find “ROMs” of each game. Downloading ROMs may be illegal depending on the laws of the country where you live.
Follow this link for a list of free emulators for the Nintendo DS. Once the emulator of your choice is up and running, you must simply capture your screen using either software for screen capture (we have reviewed lots of different programs in our Software as well as News sections) or by connecting a frame grabber to your computer monitor.


