Screen Capture, Recording, and Broadcasting with Windows Media Encoder
Do you want to use your frame grabber, screen grabber or webcam with Windows Media Encoder to record or broadcast video? If yes, then this article will help you understand the ins and outs of working with Windows Media Encoder 9 Series and get the most out of this valuable tool.
Windows Media Encoder may be downloaded free of charge at the following address: http://www.microsoft.com/windows/windowsmedia/forpros/encoder/default.mspx. The software may be used with Windows 2000, Windows XP, and Windows Vista.
In this article, a simple VGA frame grabber, the VGA2USB, will be used to broadcast and record the screen of another computer.
Configuring Windows Media Encoder (WM Encoder) for VGA or DVI Broadcast and Recording
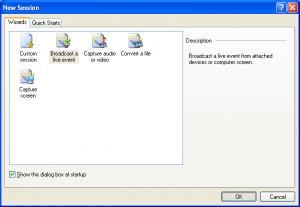
1. Open WM Encoder. The new session wizard should immediately appear. If you would like to broadcast AND record/archive at the same time or just broadcast the VGA or DVI output, select “Broadcast a live event”. If you would to record without broadcasting, select “Capture video or audio”. Click on OK.
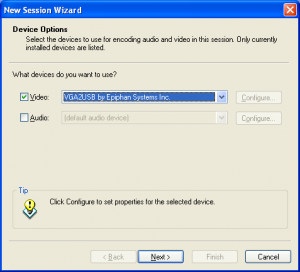
2. You will now be brought to a screen within which you can select whether you would like to record video and/or audio, and from which devices. In this example, we will record just the video output from the Epiphan Systems VGA2USB, which is a low-cost external USB frame grabber. If the frame grabber is connected but not appearing in “video” list of devices, it may be because it does not support 3rd party software or the drivers are not installed properly.
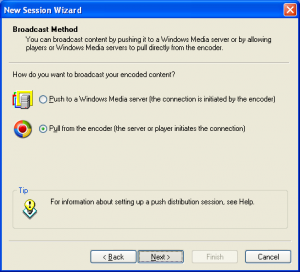
3. Now that you’ve configured which devices you’d like to capture from, the network and connection settings must be selected. In the Broadcast Method step, you must indicate whether you are planning to use an external Windows Media Server to broadcast your video, or if you want to simply use your computer. For simplicity, we will use our own computer. Thus, “pull from encoder” must be selected.
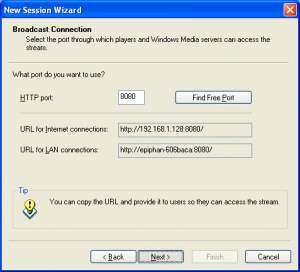
4. You must now select the network port that your broadcast is going to be sent through. If you are not sure which ports are free on your computer, simply click on “Find Free Port”. VERY IMPORTANT: Write down the 2 URLs that are given to you in this step. You will need them later in order to give to your viewers so that they can access the webcast.
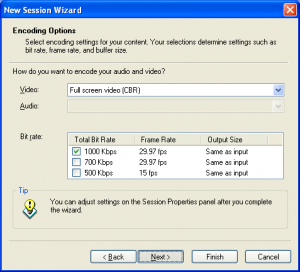
5. Now you need to select the bandwidth/quality for your webcast. This depends on how much of your internet connection you want to consume for the webcast, but 700Kbps+ seems to be the norm these days for average quality video.
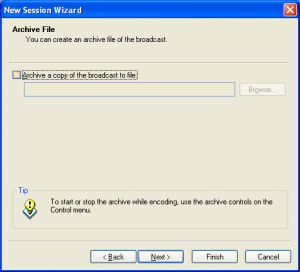
6. In the Archive File step, you may select a location on your local hard drive to save the broadcast to. That way, you may access it (and even re-broadcast it) at any time after the original broadcast has been made.
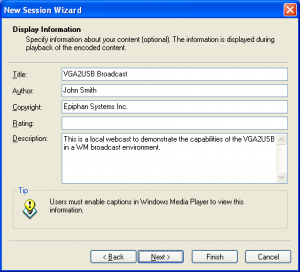
7. Here, you may put some details and copyright information about your broadcast. Your viewers will be able to see this information as it will appear if they click on “file properties” from their media player.
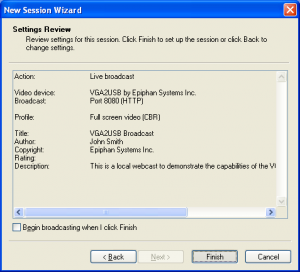
8. That’s it! You have now configured your first Windows Media Encoder VGA or DVI broadcast! Click on “Finish” to complete the wizard.
FAQ
How can my viewers open my webcast?
Your viewers can find your webcast by going to the address that was provided for you in step 4.
I gave the address to my viewers but they still cannot access the broadcast.
Are you behind a local firewall, switch or router? Disable any firewalls that might be blocking the communication between you and the client machine. If you are on a home/business network and want to broadcast to the Internet or outside of your LAN, then you must setup port forwarding to your computer on the router. This is done by going into the router’s control panel and forwarding the HTTP port provided in step 4 to your machine.
My video has both high frame rate and bandwidth settings, but is still not of sufficient quality.
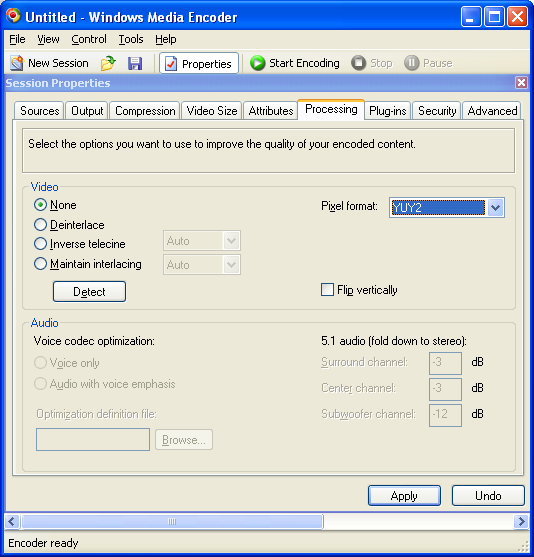
You might have to modify the video processing options. Stop your recording and click on the “Properties” button that is located at the top of the main WM Encoder window. From there, navigate over to the “Processing” tab and select “YUY2″ as the pixel format.


