

An Awesome New Tool for Web Based Webpage Screenshots and Annotations
July 6, 2009 by Victor · 2 Comments
Here at ScreenCaptureNews, when it comes to software, we like everything that’s free, useful, and simple. A good example of an application that abides by those three rules would be Aviary. Think of Aviary as a tool for capturing screenshots of webpages, similar to FireShot, which we earlier reviewed.
How it works
The way it works is quite simple, just place www.aviary.com/ before the URL of the webpage that you would like to capture.
Once that is done, you will be taken to a loading page, it means that your capture was successful and the Aviary image editor is starting.

You will then be taken to a full-blown image editor, as pictured below. The features are pretty self explanatory. Once you are done editing, you may click on “save to desktop” or “save & host online,” depending on what you would like to do with your saved capture.

Advanced Screenshot Editor
The most amazing feature of Aviary is, by far, the advanced editor, pictured below. It can be accessed by clicking on “Advanced Editor” in the top right of the window.

Those that work with Photoshop will have an easy time adapting to the advanced image editor, which tries to replicate the Photoshop interface and functions with some features like layers, history, magic wand, smudge tool, liquify tool, freeform selection tool, and more. All these features definitely make this web based applet more advanced than most free screenshot editors which need to be installed. What’s more, Aviary works with all operating systems including Windows, Mac OS and Linux, and allows for direct uploading of an image to the Aviary web servers, where you can share it with others.
Conclusion
If you don’t have a webpage screenshot editing tool that you’re used to, or if you’re looking to try something new, I would definitely recommend Aviary. It’s easy to use, it’s free, and it’s packed with features that you won’t find anywhere else!
Frame Grabber Specification Comparison Table Updated
July 3, 2009 by Victor · Leave a Comment
One of the most visited pages on our site is our massive and extremely informative feature comparison table for the world’s best VGA and DVI frame grabbers. Since it was created, some manufacturers have changed the specifications for their devices, while Epiphan Systems introduced the VGA2Ethernet frame grabber, which is now part of the table.
The first thing that you may notice is that the VGA2Ethernet has much higher specifications than any other frame grabber on the market. This is due to the fact that the VGA2Ethernet is a much more sophisticated device and, as such, is not really comparable to the other grabbers.
Why is the VGA2Ethernet different?
You can think of the VGA2Ethernet as a separate small computer equipped with a frame grabber. As such, it is able to function remotely. In other words, the VGA2Ethernet does not have to have close proximity to the target computer, as is the case with PCI or USB based frame grabbers. As shown below, the only requirement for the VGA2Ethernet is that it be on the same network as the target computer, and within proximity of the source that it is capturing the VGA signal from.

The fact that the VGA2Ethernet can be separated from the target computer distance-wise is not the only thing that makes this device different from others, however. By using the Gigabit Ethernet bus to transfer the images and a PowerPC processor paired with an advanced FPGA, the VGA2Ethernet is able to digitize images at resolutions up to 2048 x 2048 and, depending on the change in content from frame to frame, transfer them at up to 120 frames per second, making the VGA2Ethernet significantly faster than other any frame grabber available on the market.
Please click here to go to our complete VGA frame grabber review and specification page. Do not hesitate to contact us should you wish another product to be added to the table.
ScrnShots: A Screen Capture Sharing Community
The introduction of high-speed broadband internet to people’s homes meant that internet users could now share vast amounts of files and information with each-other. P2P and file sharing started out with music and has evolved into a medium through which all kinds of data and information is shared.
ScrnShots has taken the evolution of online file sharing further by offering an unlimited screenshot sharing service. In other words, you can take screenshots from your computer, post them online, tag them and name them. Other people will be able to view your screenshots and comment on them and you will be able to do the same to others.

ScrnShots Main Page
As soon as you load ScrnShots, you are able to search for screen captures simply by typing in a keyword, as in the example above. If you have an account, you may comment other people’s screenshots and upload your own screenshots to share.
Uploading to ScrnShots
Uploading to ScrnShots may be done in two ways. First, you may take your own screenshots, save as picture file and upload using a browser uploader, or you may install the ScrnShots application, pictured below.

ScrnShots capture application
The advantage to using the application is that you are able to instantly upload the screenshot, it is available for Windows and MAC OS.
For developers, ScrnShots offers and API for Windows and MAC OS, allowing you to integrate ScrnShots’ functionality in your own programs. In other words, using the API, a program can be made to upload images directly to the ScrnShots server.
Final Thoughts
While the idea of sharing screenshots is great, there are many other services that would accomplish the same thing, such as Flickr or Google’s Picasaweb, which also allow you to upload large resolution pictures, tag them, and search them. ScrnShots’ interface is very straight-forward and easy to use, which does make it a good service if this is what you are looking for.
ScreenCastle Makes Web-Based Screen Capturing Easier Than Easy
A good amount of free web-based screen capture solutions exist today, many of which we regularily review on this site. Today, however, ScreenCastle a new web-based video capture solution came to my attention.
ScreenCastle is by far the easiest web based applet I’ve used, and it really holds true to its “One Click Screencasting” philosophy. ScreenCastle brings the following features to its users:
- 100% free
- It is possible to record fullscreen or to choose the part of the screen to record
- Unlimited fullscreen resolution recording.
- Audio recording (from primary audio recording device such as computer mic)
- Unlimited video length
- Unlimited maximum number of videos
- No registration
Features like unlimited resolution, length, and number of videos truly make this applet stand out from the crowd. There is also an API provided for developers who would like to integrate this technology into their own websites and applications.
Using ScreenCastle
As soon as you open screencastle.com, you will see the huge red button to the right. That is what needs to be clicked in order to begin the screen capture.

ScreenCastle Main Page
After you click the button, a security warning comes up, you must accept it for the recording to work, as ScreenCastle needs to gain access to your computer. After that, ScreenCastle lets you choose if you would like to record your entire screen or just a part of it. You are also able to record from your mic by ticking the checkbox in the lower bottom of the window. Once you are finished configuring the recorder, the arrow at the bottom must be selected.

ScreenCastle Configuration Window
You will now see a black bar at the top of your screen. Click on “start recording” for the recording to start, and then go back to the top of the screen and select “stop recording,” then “save” in order to save your video. This is where I was disappoined. I attempted to record a minute of HD video and even though it was recorded, the video was unable to proccess, thus making ScreenCastle not all that it is made out to be.
I then went ahead an recorded some simple internet browsing with some standard definition YouTube video (near the end of the video). That didn’t work either. I tried recording 10sec of browsing a text webpage, and although it did get to the uploading step, the video never actually proccessed. I am assuming this is a temporary problem with the site and will be fixed. Once it is, samples of video recordings will be added.
Finally, assuming the uploading and processing does work, ScreenCastle gives you several ways to share your video:
- Link to watch (YouTube-like streaming Flash video)
- HTML embed code
- BBCode (for posting video to forums and message boards)
- Direct link to media file
- Preview images (for linking to video)
Conclusion
ScreenCastle is a great idea, is easy to operate, and seems to work smoothly until you get to the final step. No matter what scenarios and resolutions were thrown at it, ScreenCastle would not let me upload any of my recordings. As such, ScreenCastle’s video recording quality cannot really be judged until that bug is fixed.
VGA2LAN Development Kit to revolutionize VGA capture market
May 26, 2009 by Victor · 2 Comments
When an organization, company, or individual has an idea for a VGA capture-based product, such as a webcasting system, a recorder of VGA signals, or any other VGA-related hardware product, a separate frame grabber is purchased, mated with a PC with software, packaged, and sold.
Solutions for capturing, broadcasting and recording presentations and seminars are often rediculously expensive ($10 000+) due to the fact that the original cost of the hardware (frame grabber + capture card + PC + peripherals) runs at half the retail value of the actual product. Not only did this make VGA capture-based solutions unaffordable to some, it also meant that educational institutions such as school and colleges had to spend an arm and a leg if they were to outfit every single one of their classrooms with such devices.
In order to solve this problem, Epiphan Systems has announced and is now shipping a new product aimed at capturing the market of developers, power users, and integrators – the VGA2LAN Development Kit. With a fully open-source architecture, a custom Linux build environment, access to all drivers and ports, the VGA2LAN is poised to create a revolution in the industry.

VGA2LAN Development Kit
What is it?
The VGA2LAN platform is based off of a Motorola PowerPC chipset and comes preinstalled with a custom build of Ubuntu. The basic specifications are as follows:
- 1 VGA input with integrated frame grabber
- 1 VGA output
- Integrated Gigabit Ethernet hub
- 5 USB 2.0 ports (4 external + 1 internal)
- No moving parts
In other words, the VGA2LAN is effectively a small PowerPC-based computer with an integrated frame grabber.
VGA Capture
Of course, what interests us most is the quality of VGA capture that this device can achieve. Does it really make sense to develop products using the VGA2LAN platform or is it still better to use an internal or external frame grabber paired to a PC? The basic specs are listed below and a full list of specifications can be obtained at Epiphan Systems’ web page:
- 2048 x 2048 maximum resolution
- 120 frames per second maximum capture rate
- Lossless quality
- 270 Mpixels/s pixel rate, 532Mpixels/s if interlaced
The specifications of the integrated frame grabber are comparable to those found in high-end devices costing upwards of $2000. A detailed comparison of VGA frame grabbers can be found here. And, since the price of the VGA2LAN Development Kit is under $1000, it makes sense to use it instead of a computer + frame grabber combo often costing 5 times that amount.
A Platform for Next Generation Internet Appliances
The VGA2LAN does not come with any internal memory. However, USB 2.0 flash memory drives can be purchased for pennies on the dollar and are sold in all capacities up to 128GB, meaning that you have plenty of buffer space to work with. Furthermore, the 4 external USB ports can be used to connect external hard drives and other storage media, such as CD, DVD, or Blu-Ray burners, infinitely expanding the VGA2LAN’s storage capacity.
Since the VGA2LAN is an open source platform, devices such as USB Wi-Fi antennas can be connected in order to provide wireless communications, should the integrated Gigabit Ethernet network card not be sufficient for your application. Furthermore, the presence of USB 2.0 ports means that peripherals suchs as keyboards, mice, AMX/Crestron control units, and others can be interfaced with the VGA2LAN, making it perfect for virtually any application that involves the capture of VGA signals.
The VGA2LAN Development Kit is a great way to build, use, and sell hardware products for a company or organization that doesn’t have the resources, finances, or expertise to manufacture their own capture hardware. And, at a price of $999 US, it is most definitely a bargain.

Example of how VGA2LAN can be used
New free and easy to use screenshot software for Windows XP and Vista
February 25, 2009 by Victor · 4 Comments
We at Screen Capture News like to write about interesting software releases that allow us to do new things in the field of screen capture and recording. Screen Capturer, however, does nothing but the most simple operations, and we like that too. If you are still saving a lot of screenshots using the traditional PrintScreen button method, you’d know how annoying it is to open up an image editing application each time that you want to transfer it from a clipboard to a file (in Windows XP).
Screen Capturer is a 100% free application that is launched automatically whenever you press your PrintScreen button.

Screen Capturer allows you to:
- Capture your entire screen, part of the screen, or a window on your screen.
- Create an image file out of the screen capture in many formats, including BMP, JPG, GIF, PNG and TIFF.
- Capture a video of your screen activity in .WMV (Windows Video) format.
- Send the captured image or video directly to the Windows clipboard, an Image/Video file, e-mail, or to print from the printer.
Of course, this program isn’t going to give you advanced editing or annotation functionality or provide you with many more options than what is listed above. Sometimes, however, all you need to get the task done is something simple, and Screen Capturer does that job perfectly.
EDITORS NOTE (27/10/2009): It looks like the program is no longer offered for free. Please have a look at our Software section for more similar free solutions.
Screen Capture, Recording, and Broadcasting with Windows Media Encoder
Do you want to use your frame grabber, screen grabber or webcam with Windows Media Encoder to record or broadcast video? If yes, then this article will help you understand the ins and outs of working with Windows Media Encoder 9 Series and get the most out of this valuable tool.
Windows Media Encoder may be downloaded free of charge at the following address: http://www.microsoft.com/windows/windowsmedia/forpros/encoder/default.mspx. The software may be used with Windows 2000, Windows XP, and Windows Vista.
In this article, a simple VGA frame grabber, the VGA2USB, will be used to broadcast and record the screen of another computer.
Configuring Windows Media Encoder (WM Encoder) for VGA or DVI Broadcast and Recording
1. Open WM Encoder. The new session wizard should immediately appear. If you would like to broadcast AND record/archive at the same time or just broadcast the VGA or DVI output, select “Broadcast a live event”. If you would to record without broadcasting, select “Capture video or audio”. Click on OK.

2. You will now be brought to a screen within which you can select whether you would like to record video and/or audio, and from which devices. In this example, we will record just the video output from the Epiphan Systems VGA2USB, which is a low-cost external USB frame grabber. If the frame grabber is connected but not appearing in “video” list of devices, it may be because it does not support 3rd party software or the drivers are not installed properly.

3. Now that you’ve configured which devices you’d like to capture from, the network and connection settings must be selected. In the Broadcast Method step, you must indicate whether you are planning to use an external Windows Media Server to broadcast your video, or if you want to simply use your computer. For simplicity, we will use our own computer. Thus, “pull from encoder” must be selected.

4. You must now select the network port that your broadcast is going to be sent through. If you are not sure which ports are free on your computer, simply click on “Find Free Port”. VERY IMPORTANT: Write down the 2 URLs that are given to you in this step. You will need them later in order to give to your viewers so that they can access the webcast.

5. Now you need to select the bandwidth/quality for your webcast. This depends on how much of your internet connection you want to consume for the webcast, but 700Kbps+ seems to be the norm these days for average quality video.

6. In the Archive File step, you may select a location on your local hard drive to save the broadcast to. That way, you may access it (and even re-broadcast it) at any time after the original broadcast has been made.

7. Here, you may put some details and copyright information about your broadcast. Your viewers will be able to see this information as it will appear if they click on “file properties” from their media player.

8. That’s it! You have now configured your first Windows Media Encoder VGA or DVI broadcast! Click on “Finish” to complete the wizard.

FAQ
How can my viewers open my webcast?
Your viewers can find your webcast by going to the address that was provided for you in step 4.
I gave the address to my viewers but they still cannot access the broadcast.
Are you behind a local firewall, switch or router? Disable any firewalls that might be blocking the communication between you and the client machine. If you are on a home/business network and want to broadcast to the Internet or outside of your LAN, then you must setup port forwarding to your computer on the router. This is done by going into the router’s control panel and forwarding the HTTP port provided in step 4 to your machine.
My video has both high frame rate and bandwidth settings, but is still not of sufficient quality.
You might have to modify the video processing options. Stop your recording and click on the “Properties” button that is located at the top of the main WM Encoder window. From there, navigate over to the “Processing” tab and select “YUY2″ as the pixel format.

Using Adobe Connect Pro and a Capture Card to Broadcast VGA
February 24, 2009 by Victor · Leave a Comment
What makes software packages like Adobe Connect Pro, Cisco WebEx, and Microsoft Live Meeting useful is the ability to broadcast anything that is visible on the computer screen as long as you have one of these applications installed and running. However, there are situations where one cannot install a web collaboration/presentation software on a computer but still needs to broadcast the image from it. It is also possible that you are using a device or operating system that is incompatible with your favorite webcasting software. Perhaps you would like to broadcast from a document camera pod with a VGA or DVI interface.

Some situations where an external frame grabber is useful:
- When a network connection is lost, the presenters screen is still being recorded.
- There are not enough system resources to run Connect Pro, or the computer does not allow the installation of Adobe Connect Pro.
- Switching layouts- Once a layout has been switched, the computer sharing the screen in the previous layout needs to be activated again.
- Audio – When working with demos, the demo machine’s audio needs to have the Connect Pro audio installed, but muted (through the voice and camera pod) otherwise the session’s audio will echo.
- Bandwidth – Each demo computer needs to be logged into the Connect Pro meeting. When many computers/devices are connected to a Connect Pro meeting, too much bandwidth is “eaten up”.
- Unsupported devices – Since Adobe Connect Pro is normally only compatible with Windows and Mac OS X, adding a frame grabber allows you to use Connect Pro on any device with a VGA or DVI port.
source: www.connectusers.com
In order to accomplish this, you would need to use a frame grabber connected to a Connect Pro capture computer. You would then launch the application that comes with the grabber on the computer with the VGA grabber and share it with Connect Pro. As long as the VGA source is connected to the grabber itself, then you’re ready to broadcast the image from it!

What frame grabber works best with Adobe Connect Pro?
There is no universal answer to this question and it really depends on what your capturing needs are. If you are looking for something cost-effective and do not need to broadcast an image with as lot of movement, then the Epiphan Systems VGA2USB will be enough. However, if you need to broadcast an HD or other high-quality imagery, then we suggest to look into the NCast DCC3.1, Epiphan VGA2Ethernet, or DVI2USB Duo.
For a detailed comparison and description of the most advanced high-resolution frame grabbers on the market, please refer to our frame grabber comparison table.
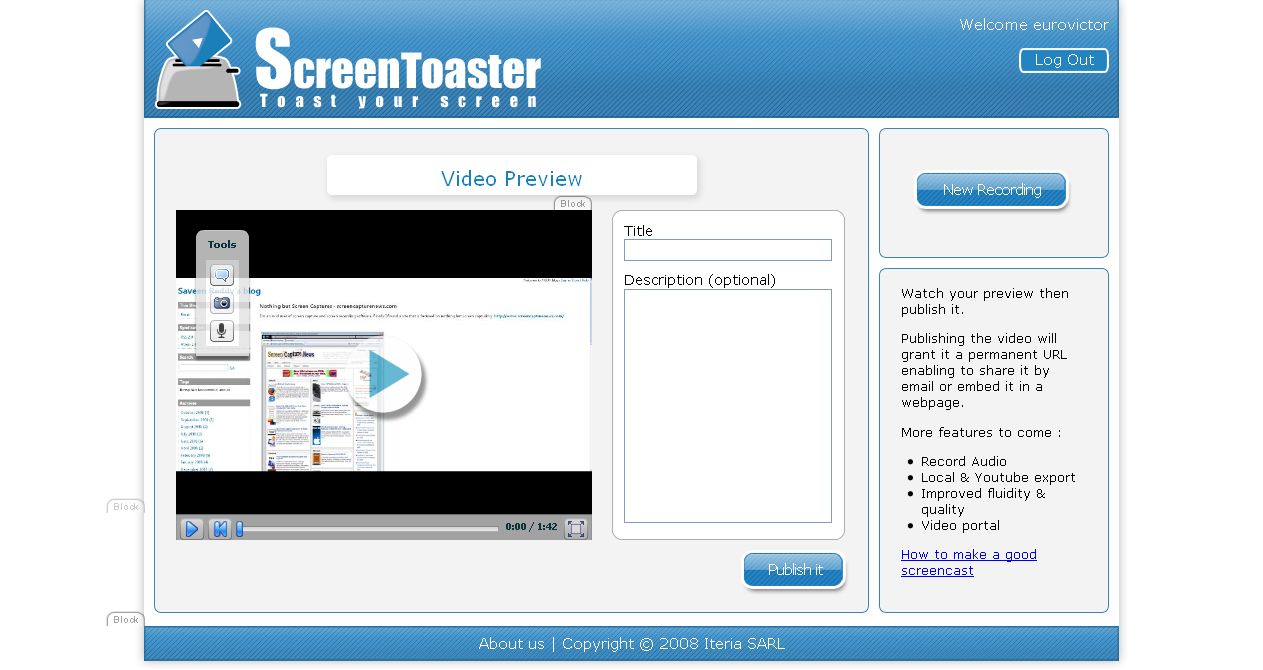
ScreenToaster 2.0 Released
January 14, 2009 by Victor · Leave a Comment
ScreenToaster is probably the most exciting, easy-to-use, and feature packed free screen capture applet available. Today, the developers of ScreenToaster have announced that the Beta testing is over and that ScreenToaster 2.0 is available with the following new features:
- Live audio capture
– Embed webcam in screen capture
– Accelerated or slow-motion playback
– Pauses during recording
– Download the completed screencast (experimental)
– Redesign and improved content organization
– Personal profiles
The devs over at ScreenToaster are also promising an API and direct uploads to video sharing sites like YouTube, Veoh, DailyMotion, and others. If these features will be added, then ScreenToaster will be hands down the best free screen capture application available.
You can read our review of the ScreenToaster beta by following this link.
Broadcast a VGA Signal over Wi-Fi With Ease
December 16, 2008 by Victor · 2 Comments
A while back, we had an article that featured a device made by IOGear that broadcasts a video signal over Wi-Fi to a VGA output. Now, Epiphan Systems has released a device, the VGA2WiFi, that does almost the exact opposite.
Imagine you are giving a presentation or a lecture and you would like to give your audience real-time instant access to what is being displayed on the conference screen. Normally, you’d have to either prepare slides ahead of time and hand them out ahead of the presentation or make them available later. This might be alright if you are using PowerPoint only, but imagine that you are demonstrating the image from a VGA device that is not a computer, such as an embedded machine, electronic microscope, or medical device.
The VGA2WiFi solves this problem by taking any VGA signal, converting it into a digital image, and broadcasting it over 802.11g Wi-Fi for your audience to view. As long as your viewers have access to any 802.11b/g-enabled device with a web browser, such as a smartphone, PDA, or notebook computer, they are able to view the presentation on their screens as it happens. No additional software needs to be installed.

What’s more, the VGA2WiFi works with signals of up to 1600 x 1200 and broadcasts a true lossless image, meaning that 100% of the source image quality is retained, which is important for environments where a high level of precision is required.

